
The more obvious and tempting it is, the more likely it’s trapped, cursed, an ambush, or a monster in disguise.
Seriously, who leaves unguarded treasure out in the open?

The more obvious and tempting it is, the more likely it’s trapped, cursed, an ambush, or a monster in disguise.
Seriously, who leaves unguarded treasure out in the open?
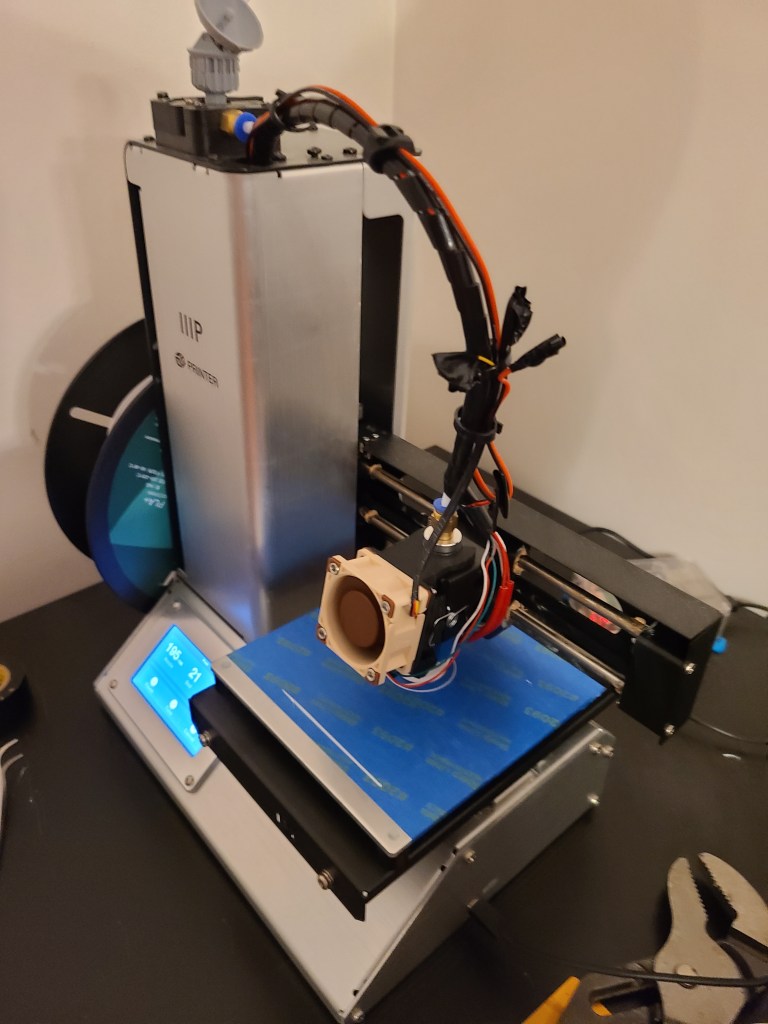
Things have been really busy the past few months, but I’m finally getting back to working on the 3D printer.
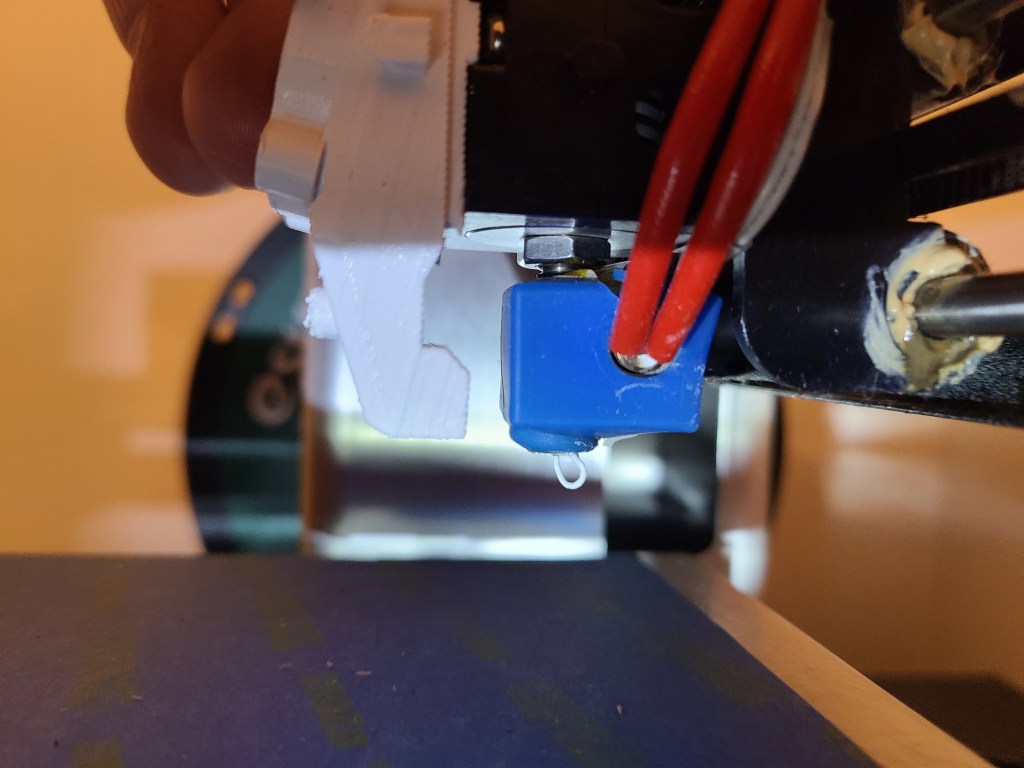
I’ve been splicing various premade models designed for previous generations of the Monoprice Select Mini into one that allows for a better hotend fan and a part cooling fan.
Next up is properly setting up the wiring, manual switch, and integrating it into the wire bundle for the hot-end. Then recalibration.
Don’t get cocky. Laughing off a threat comes shortly before death.
It’s never “just a goblin.”
Always carry at least one knife in an easily reachable spot. It’s the basic tool of survival and defense.
Rest in peace, poor nameless adventurer who starved to death with sealed rations in their pack.
I’m starting a new fiction series. More information can be found here:
https://technomancers-sanctum.blog/rals-guide-to-adventuring/
I’ve been working on a few things crafting-wise lately, none of them too major at the moment.
Minis-Painting:
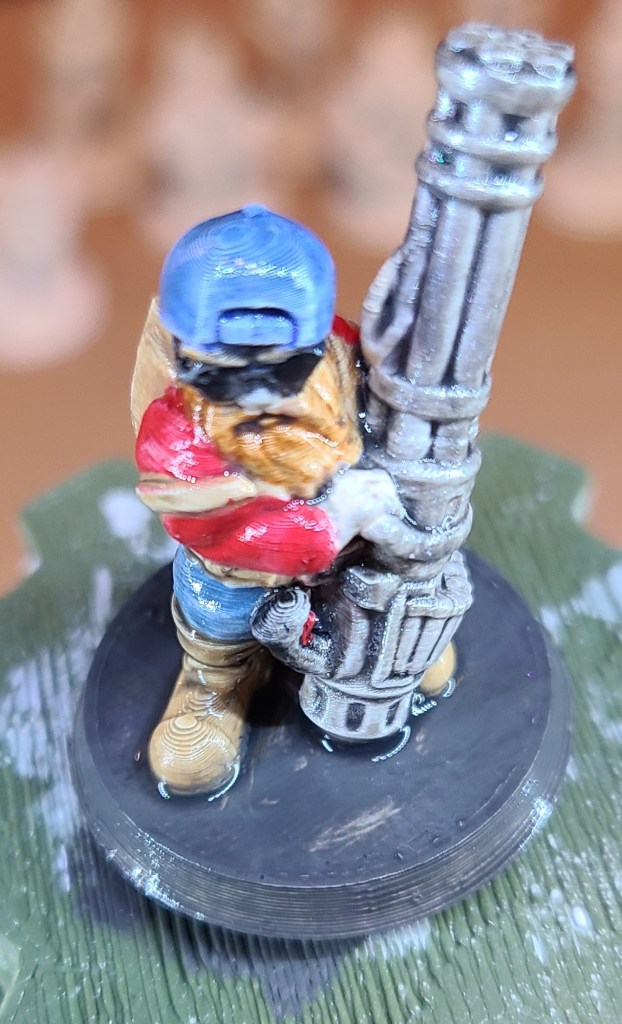
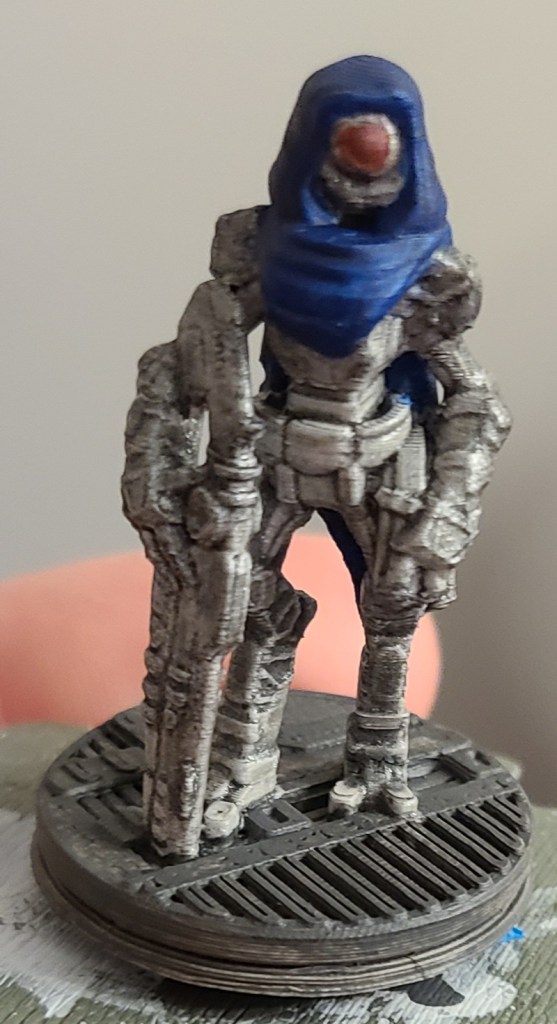
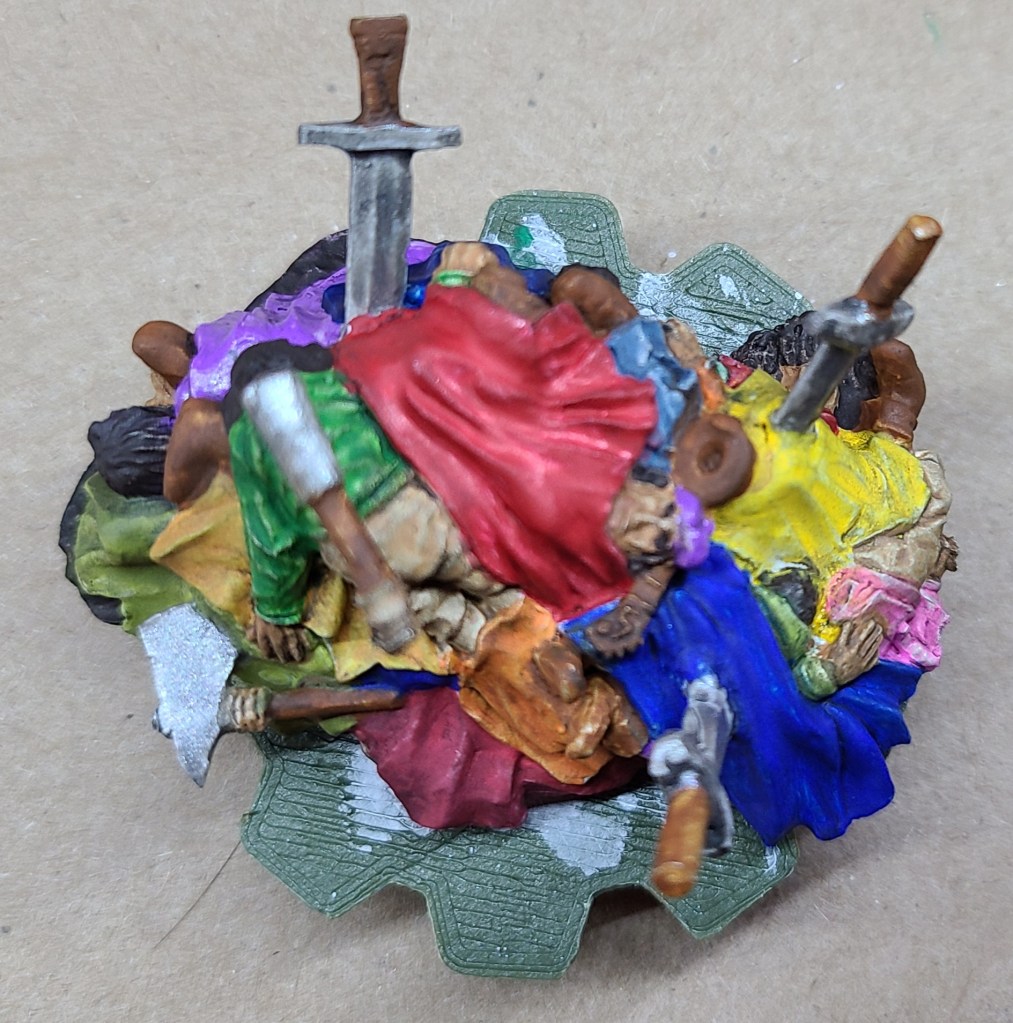
I decided to paint a few minis again. I’m hoping to print some minis for a game of Shadowrun soon, so while I’ve been tinkering with the printer I’ve been painting a few small things. A couple of minis that wouldn’t be out of place in-genre, and the Mound of Dead Bards from Gamers: Dorkness Rising. That last one took quite a bit of work.
3D printer tinkering:
I’ve so far never managed to get the Monoprice Select Mini Pro to print minis as nicely as the other printer. I’ve been tinkering with some settings, and also with the hardware. Main thing I want to change is to improve the part cooling. I’ve gone through a couple iterations of air vent modifications and swapping in a better fan, but I really think it needs 2 fans. Unfortunately all the designs I see that include 2 fans are for different configurations or models, so I’m having to do some model splicing and editing. The main issue I come across is that the bed levelling/z axis sensor is mounted in a specific location not present on earlier versions of the MPSM, so I’m having to carefully splice that mount in in a way that is compatible with the air mods. I’m also doing a bit of experimentation with freehand modifications with the 3d printing pen, but the improvement has not been significant.


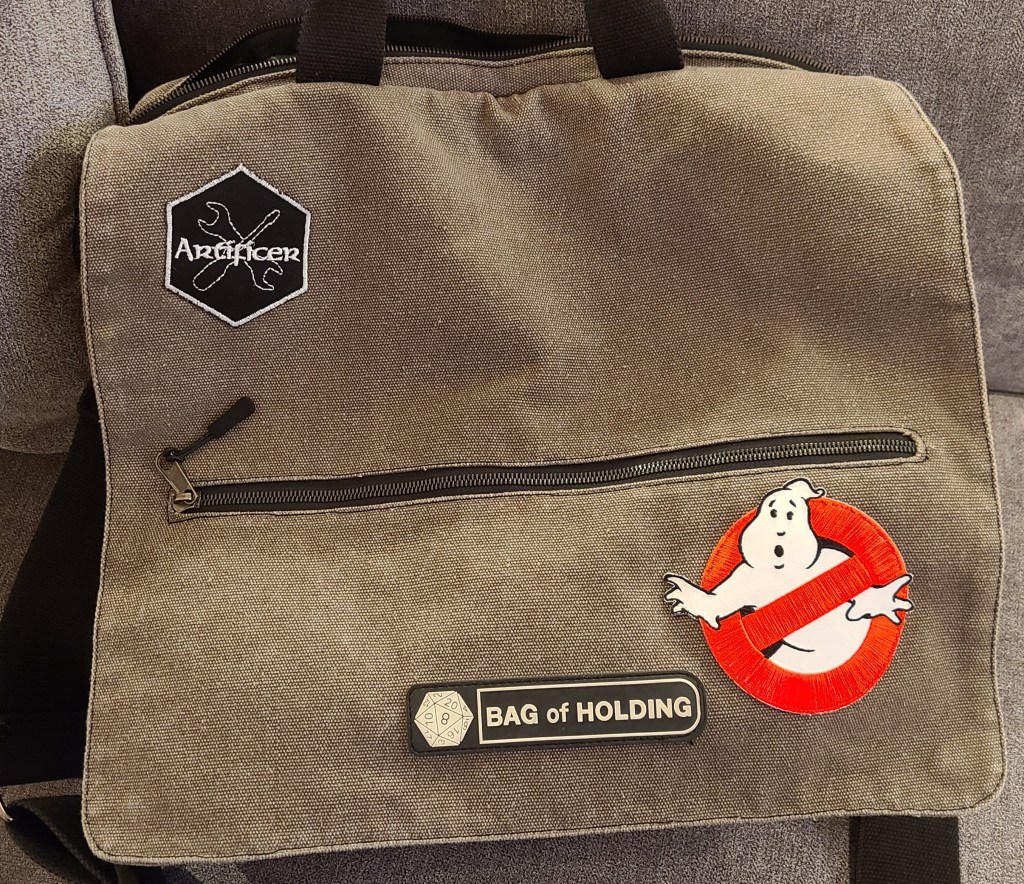
Bag of holding repair/upgrade:
I’ve had a bag of holding from Thinkgeek for years. Used it in my college days until I overloaded it with weight and damaged it beyond my ability to repair at the time. I’ve carried it with me from place to place, and occasionally used it (with some safety pins over a busted zipper or two) for thematic appropriateness or something “close enough”.
Recently I came across the bag again, and decided to work on it, inspired by finally going to a tabletop RPG night again. So far I’ve repaired the failed zipper, reinforced all the zippers, and added pull tabs on the zippers to make them open and close more easily. I repaired the fabric where the stitching had been coming loose, such as on the zippers and the strap where it attaches. Since I’m gaming in a high traffic makerspace, and I recall these bags being somewhat common, I’ve been adding patches to make it more identifiable. Most recently I decided to finally test out tge chemical NeverWet, and a “magic bag” seemed an appropriate use of it

I’m currently waiting on the neverwet to dry. I was able to use an old pressure fit curtain rod to hole the bag between two posts for spraying. Thankfully the fumes died down after a while. They were pretty bad, and got throughout my home, even though I sprayed outside.
I keep a wall of hats above my shelves of board games, as kind of a thematic backdrop, especially with the RPGs. One that needed to go on the wall is a pirate hat. However, most of the pirate hats I saw were disappointing to me. For one thing, ever since my childhood, this has been my idea of THE pirate hat:

Dustin Hoffman as Captain Hook in the movie Hook.
So, I decided to make my own version of the hat.
Parts list:
Tools List:
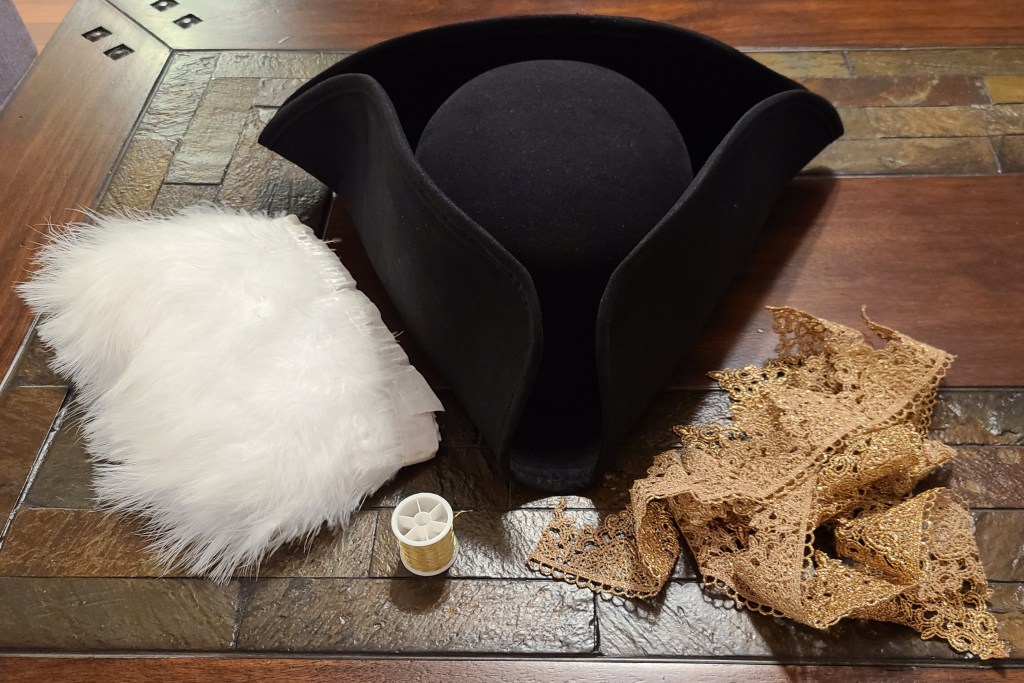
To start with I took the hat, and cut and sewed the gold trim on along the edge, using the gold thread to hide the stitching.
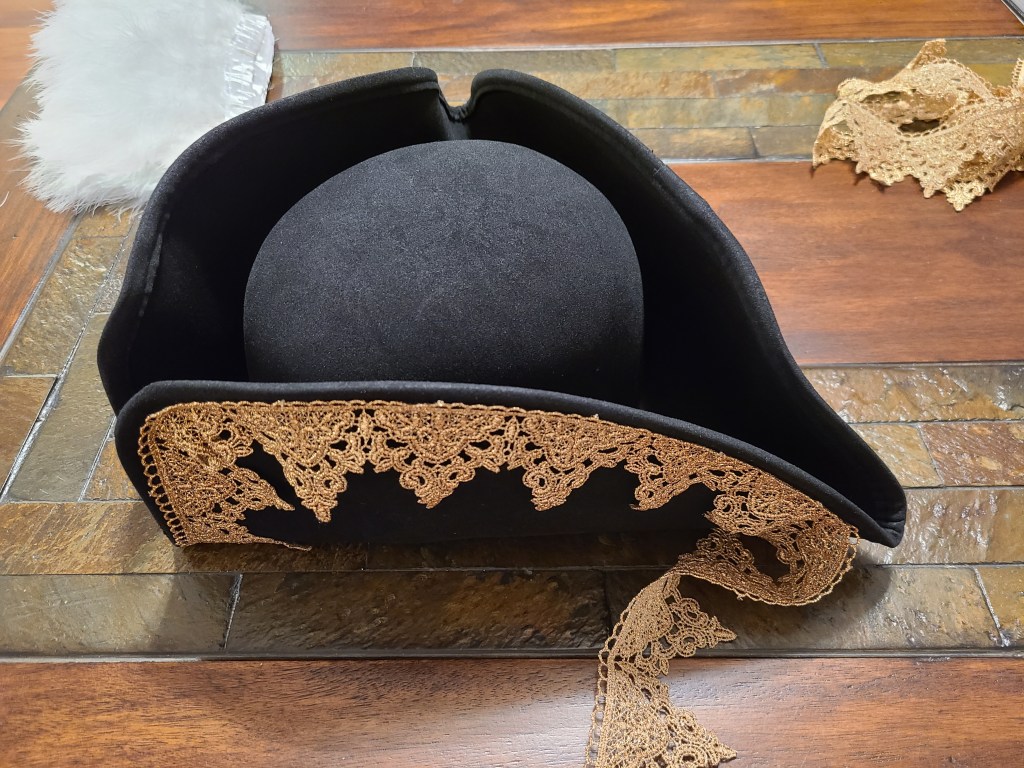
In some places where there was a bit internal curve I had to detail trim some of the lace so it would lay flat and not look too out of place.
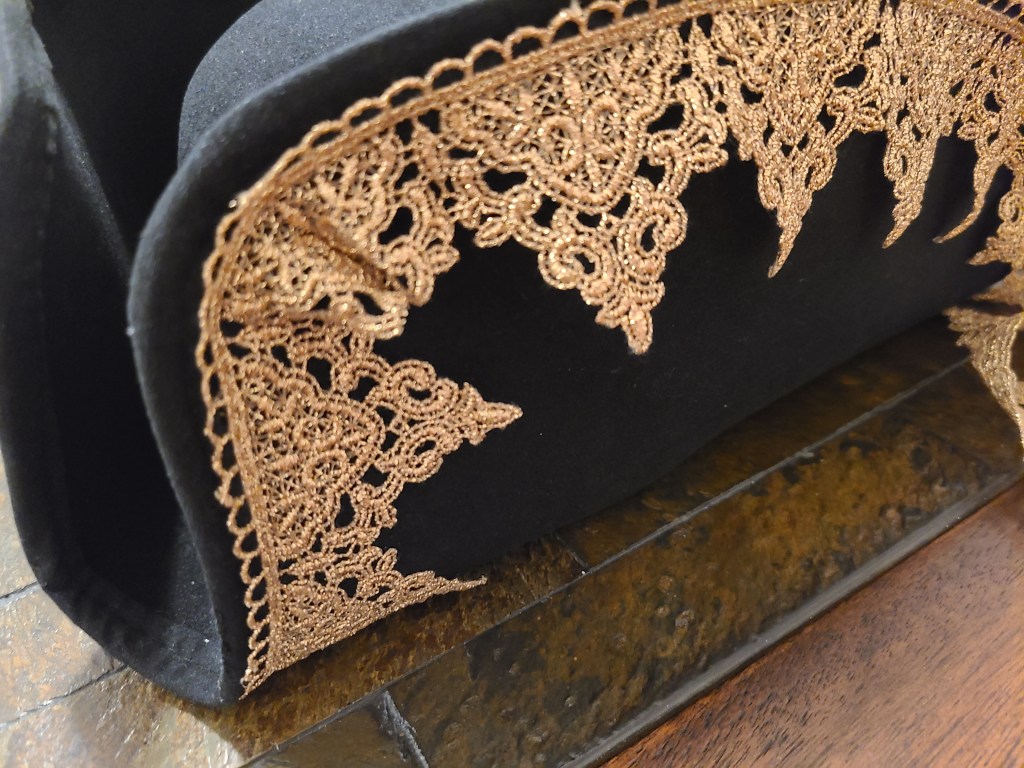
As I expected, I would see that I would need to glue and/or stitch the lace points down so they would lay right.

I started brushing on felt glue on the back of the lace, and pinning it into place so that I wouldn’t have to worry about curling or stretching or anything like that.
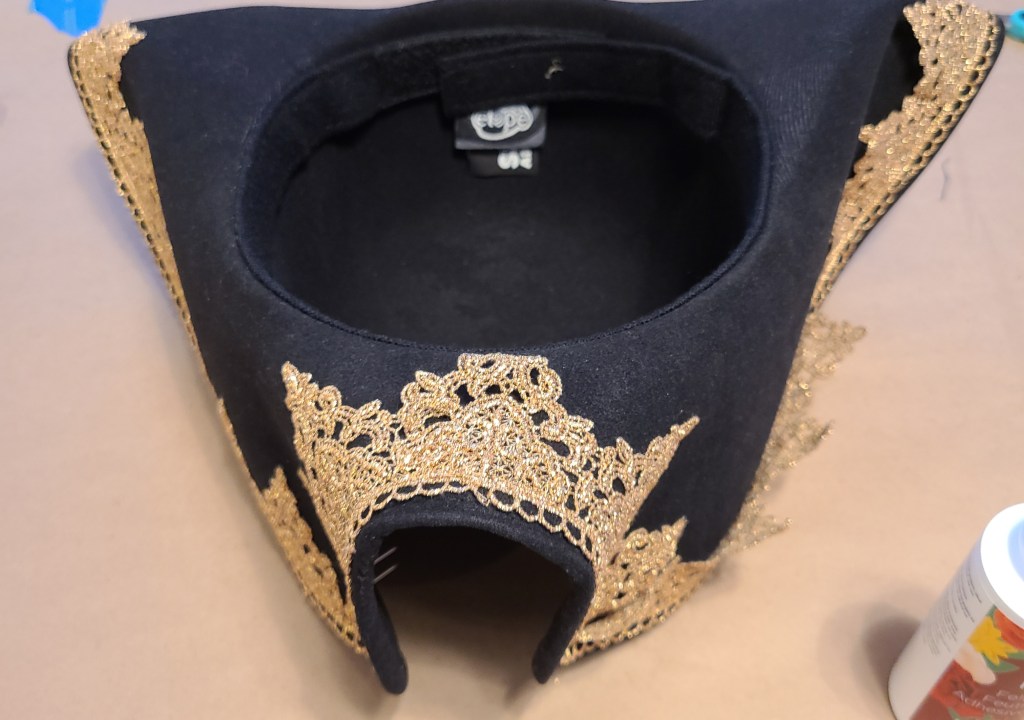
I let the glue dry for 24 hours, then removed the pins and began stitching some more. Reinforcing the points, some spots I thought were popping up a little, and other parts I thought might need more stitching. Not much to see there except some ugly stitches that I later covered up.
Upon consultation, I realized that the maribou was a bit too thick, and needed to be trimmed to work. I cut it into 3 distinct sections for easier sewing, and then used the pliers to remove alternating groups of feathers. Over time I stitched through the connecting ribbon of the maribou trim into the hat, with some truly atrocious looking stitches. You can also see some of the tack stitches that I used to reinforce the lace and glue.
Tip: when you stitch the maribou through, some adhesive from the ribbon will adhere to the needle, and tiny bits of feather will be pulled through with it. As far as I know you can’t prevent this, but just know that you will need to use your fingernails or maybe some tweezers to pluck those feather bits off. Then run a lint roller over it.

In the spirit of Adam Savage’s philosophy of “hide your costuming crimes,” I decided that the stitching was going to bother me and needed to disappear. If I were just wearing the hat on my head, I probably wasn’t going to care, but my hats hang on a wall facing the living area, so it needed to look a little better. This is when I decided to do some research, and found a black felt adhesive tape that would blend into the hat.
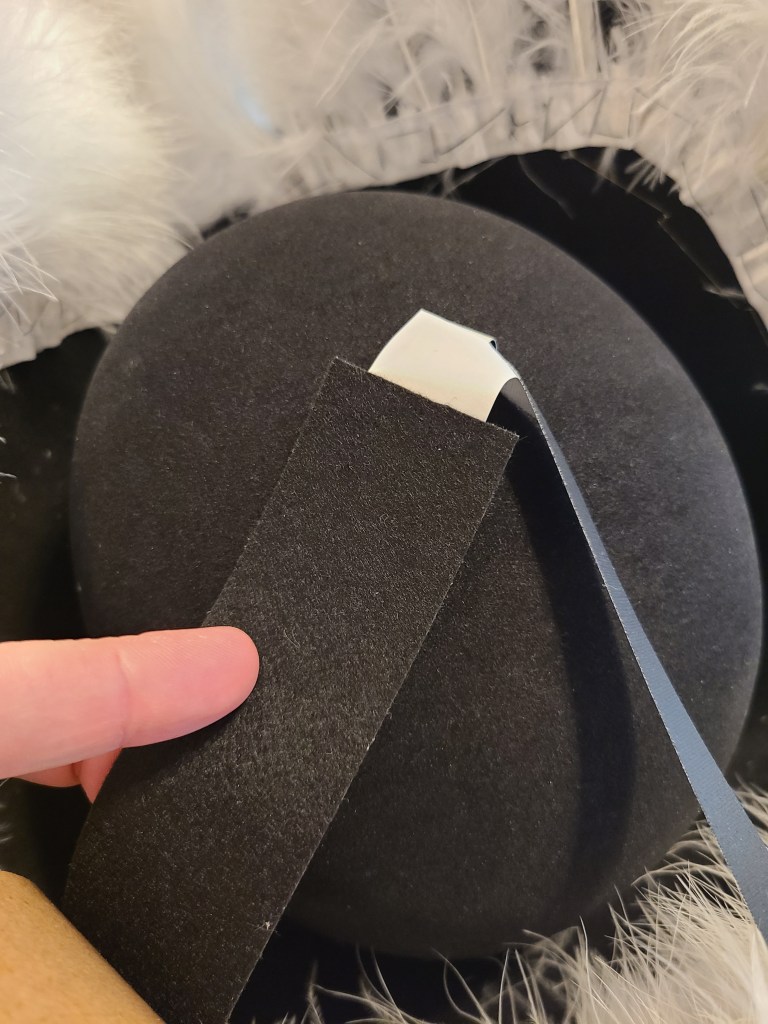
To not end up with a mess with all these light weight feathers sticking to the tape, I prepped by using a hand towel to hold the feathers back with the weight of it.

Then I cut segments of tape to handle the contours of stitching and cover things up. I placed the tape in segments, and then moved to each section in turn.

By the end of it, the stitching was pretty much hidden.

At this point, you’re going to want to use a little bit of painter’s tape to get bits of feather out of the inside of the hat. DO NOT use the lint roller for in there, you will catch it on the feathers that you want to stay on the hat. You may also want to run the lint roller on the outside of the hat.
And now I finally have my pirate captain hat!
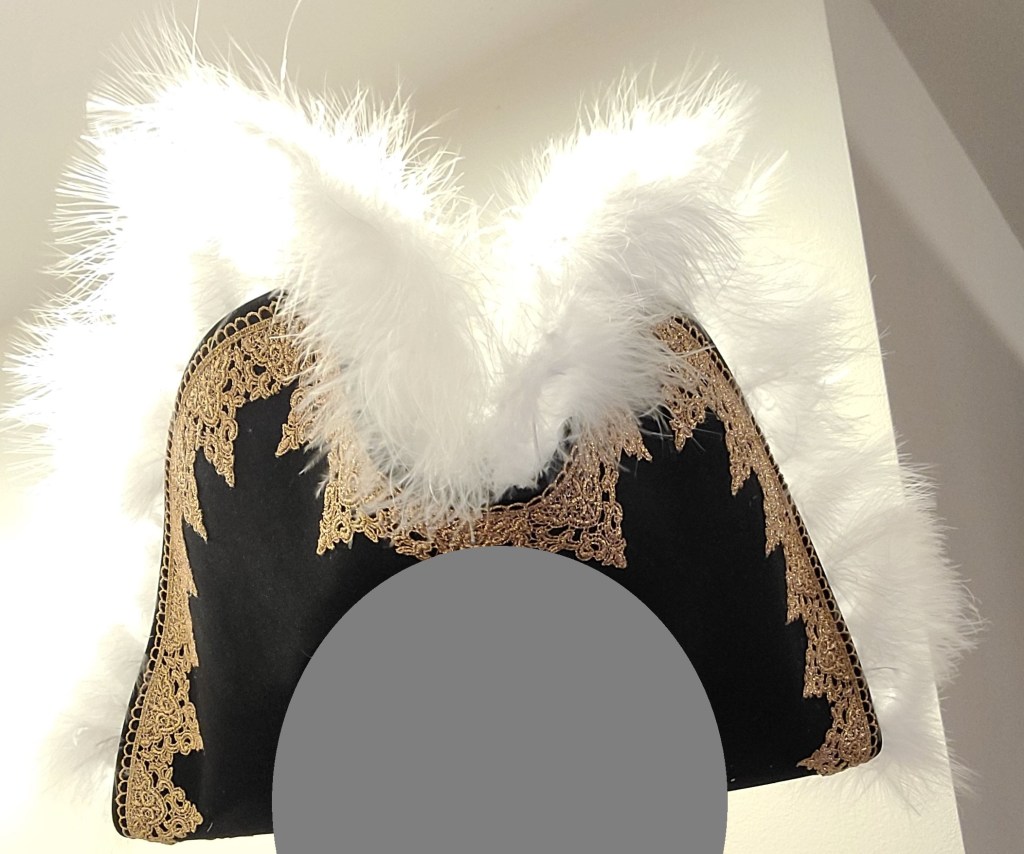
And the wall of hats is slightly more complete. Still needs something space themed. I’m thinking there might be a space helmet project in my future.

Recently I’ve joined a local makerspace, and started on broadening my experience on a wider variety of tools. Starting with using a laser cutter. So far I’ve gotten my sign-off to use it, and started a couple small projects. One was straightforward, and just got me familiar with the basics. I made myself an edge-lit acrylic sign, using parts from a kit, and just engraving it and assembling.


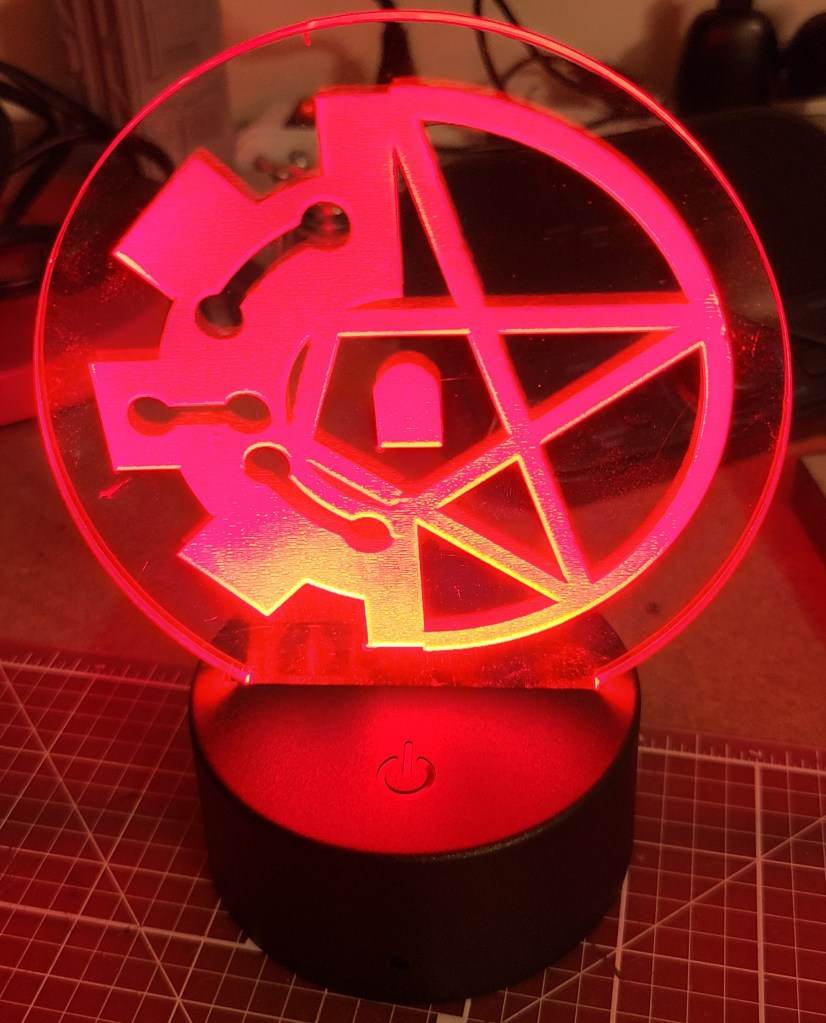
Pretty straightforward, gives me some themed lighting, and was good for getting a bit more familiar with some of the process of creating my own engraving.
The other laser project has not been going so well. So far I’ve made two attempts to create a two-layer battleboard for carrying around my laptop at the makerspace. I designed the thing in Autodesk Fusion 360, exported the files, got everything set up, and it seemed to be going well. On the first attempt it turned out that I had some settings a bit too fast and lower power, and the wood was rather thick. I went through several passes with the laser, and it still didn’t cut through. I reserved the machine again later to reattempt (had to use a new section of wood because I couldn’t align it to use the same origin as before).
And then the safety latch on the door started malfunctioning and caused the machine to refuse to fire the laser… but did not indicate that in any way. The machine moved in it’s preprogrammed sequence as if it were fine, but after a bit I noticed I didn’t see any more evidence of cutting. No smoke, no flashes of light from the material burning away… and the power usage needle never spiked from the laser firing. So far I’ve just got a neatly scorched piece of wood, and will probably need to purchase and chop another piece to try again. Uggggh.
I’d have tinkered with the machine, but I’m not one of the responsible parties for that equipment at the makerspace.

On the bright side, one of my other side projects is going pretty well.
I’ve started working on my interpretation of Captain Hook’s hat (from Dustin Hoffman in the movie Hook). My wall of hats for themed gaming has been missing a pirate hat, and to me that is the iconic pirate hat, so I’m making my own (using a simpler hat as a base). I’ll have to break that down more later.
So, it’s been quite a while since I’ve posted, and at this rate I’m not sure I’ll be finishing a detailed description of the design and construction process anytime soon, so I’m gonna skip ahead a bit. If there’s enough interest in explaining the portions that I’ve skipped past (or I make myself take the time) I may circle back and explain.
Anyway, here we go. Through a lot of tinkering with 3D models, learning how to perform photogrammetry, and some hands on work, I finally finished the polterbuster, so now I have my completed costume.
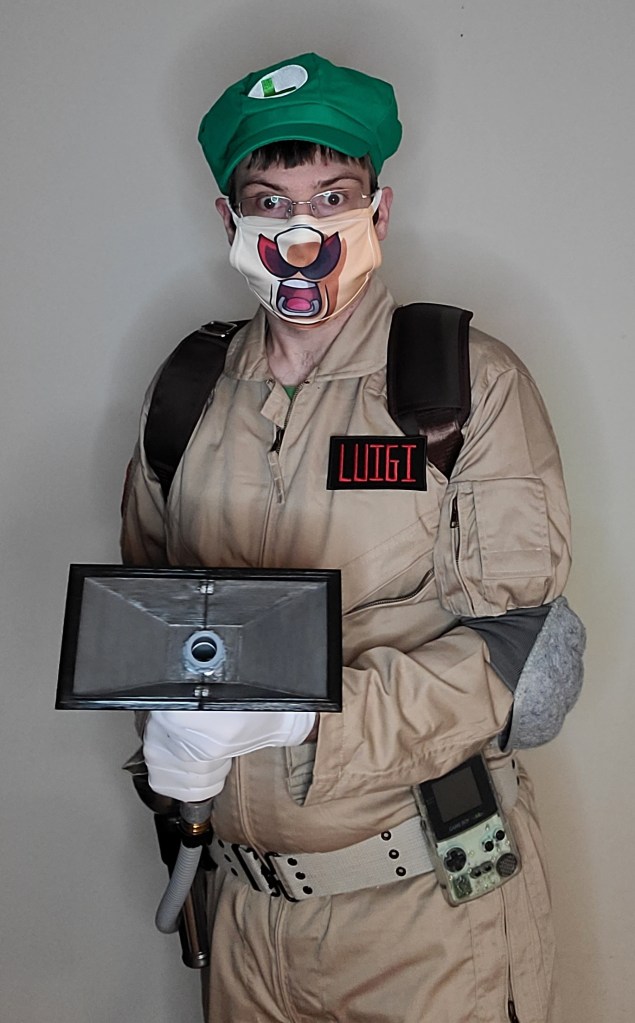
I got the hand unit to hang off the side of the pack on the custom made mounting brackets with some magnets. Haven’t yet gotten the straps to handle the pack being unbalanced with the unit on it yet.

And now here’s everything put together. It was finished just in time for Halloween… when there was nowhere to go. Oh well, there’s always the next convention!
Maybe one day I’ll revisit this and get some decent sound effects added to it.
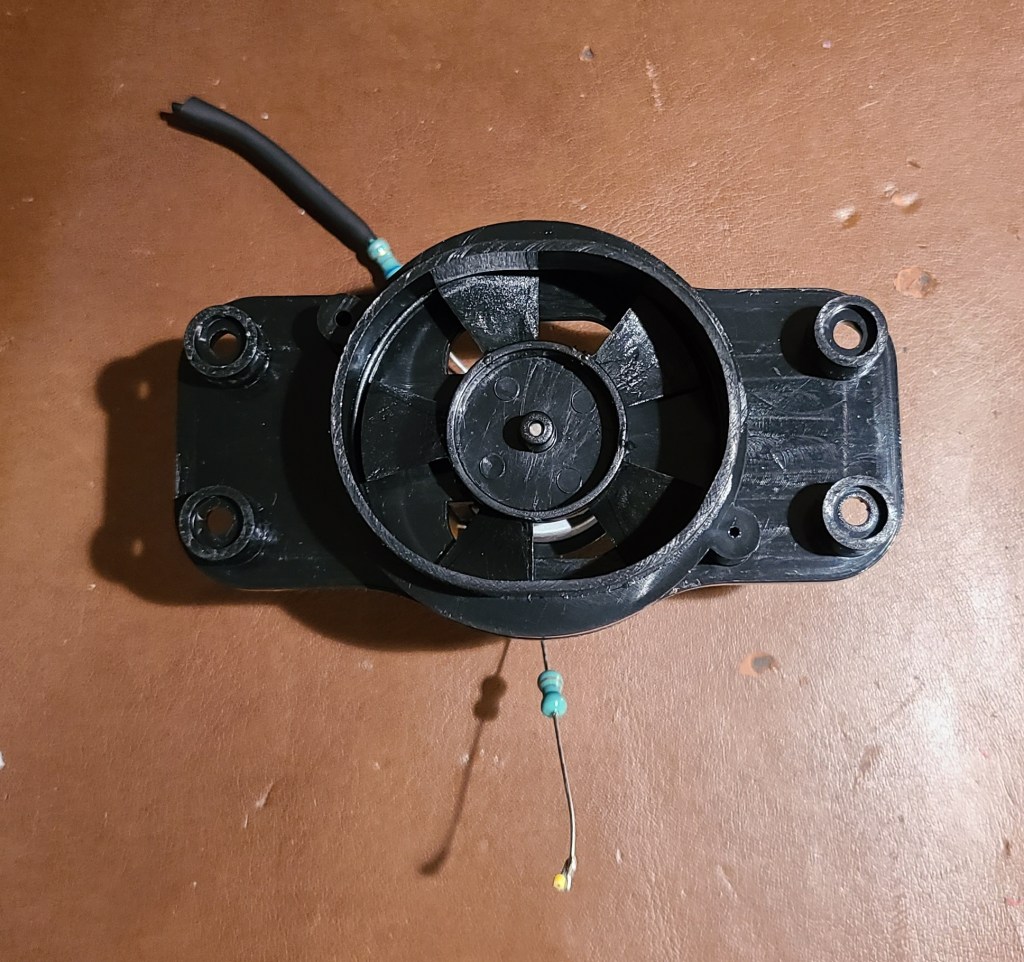
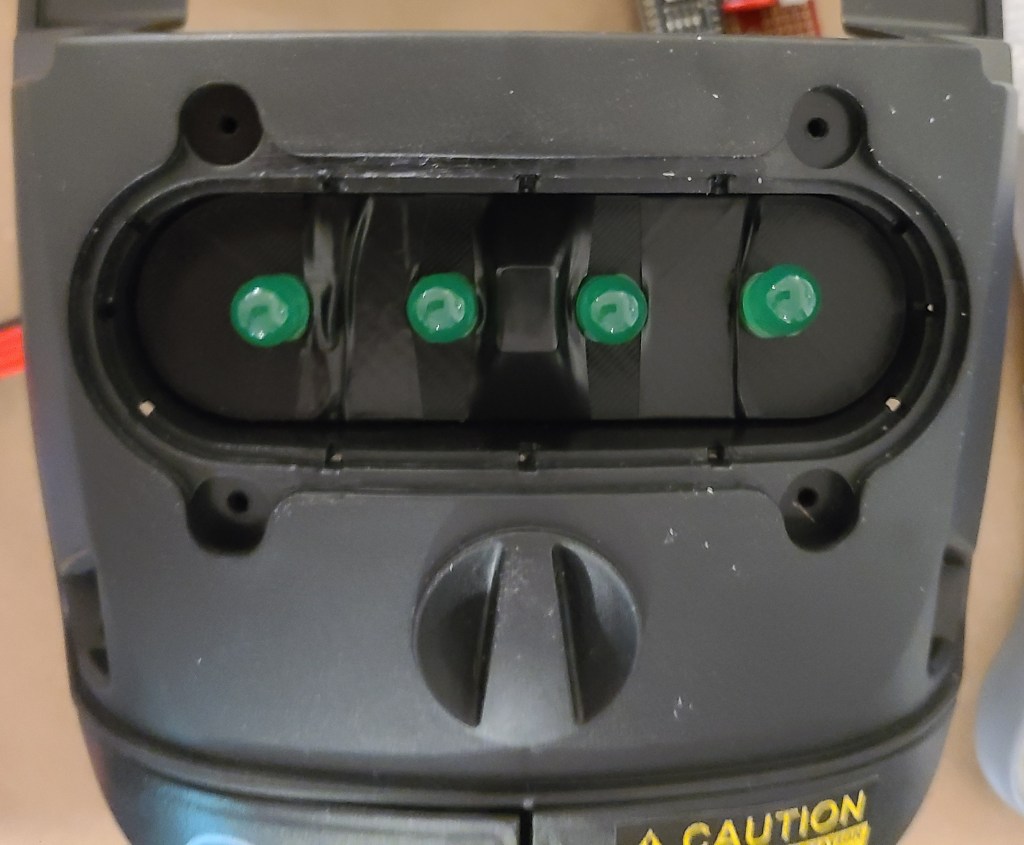
The clear compartment on the original vacuum contained a lot of white foam balls that got blown around by a fan when the toy was turned on. I decided that I was going to install lights here. The Poltergust from the games had one light… but this is an imprecise mashup piece. I decided to go with 4 lights, in homage to the proton packs, but green to match the aesthetic of Luigi’s Mansion.
Here’s what I was working with:

I removed the foam balls, and originally I was also going to chuck the fan in the trash too, but I hold onto parts like that just in case, and I’m glad I did. This will be important for later.
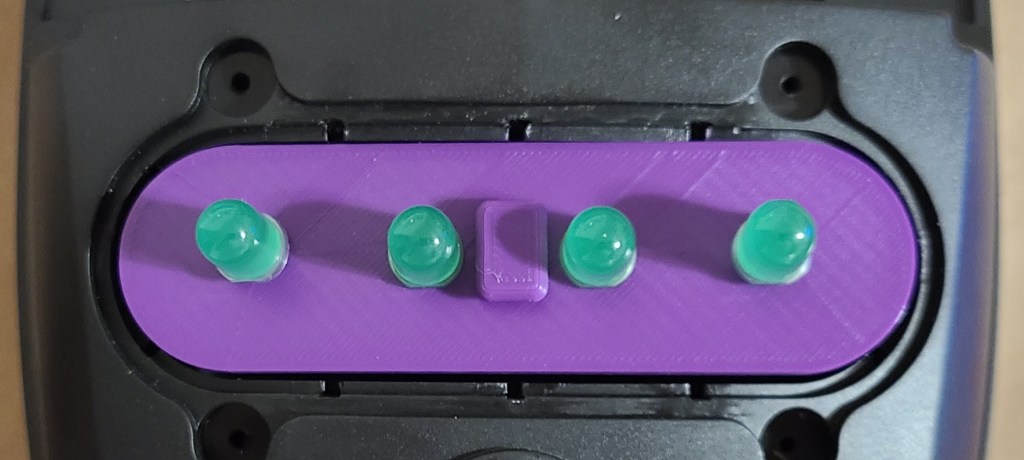
For the lights I ordered some 10mm green LEDs (I like my tech chonky, especially for a cartoon character), and the accompanying resistors.

I 3D modelled and printed a piece to hold them into place in the spacing I wanted, and after a lot of frustration and soldering I got them into the installed. I put a solderless connector on the end so that I can separate parts when troubleshooting and/or if I decided to mount the board on the other half of the casing. I really need to spend some more time practicing crimping those connections correctly.

To control the lights for a blinking pattern, I used a knockoff arduino nano and modified some simple code for it. Gotta watch out for those knockoff boards, though. I had to go find special drivers so I could use the board, which can be nervewracking. You never know what people are going to include in code from an obscure website.


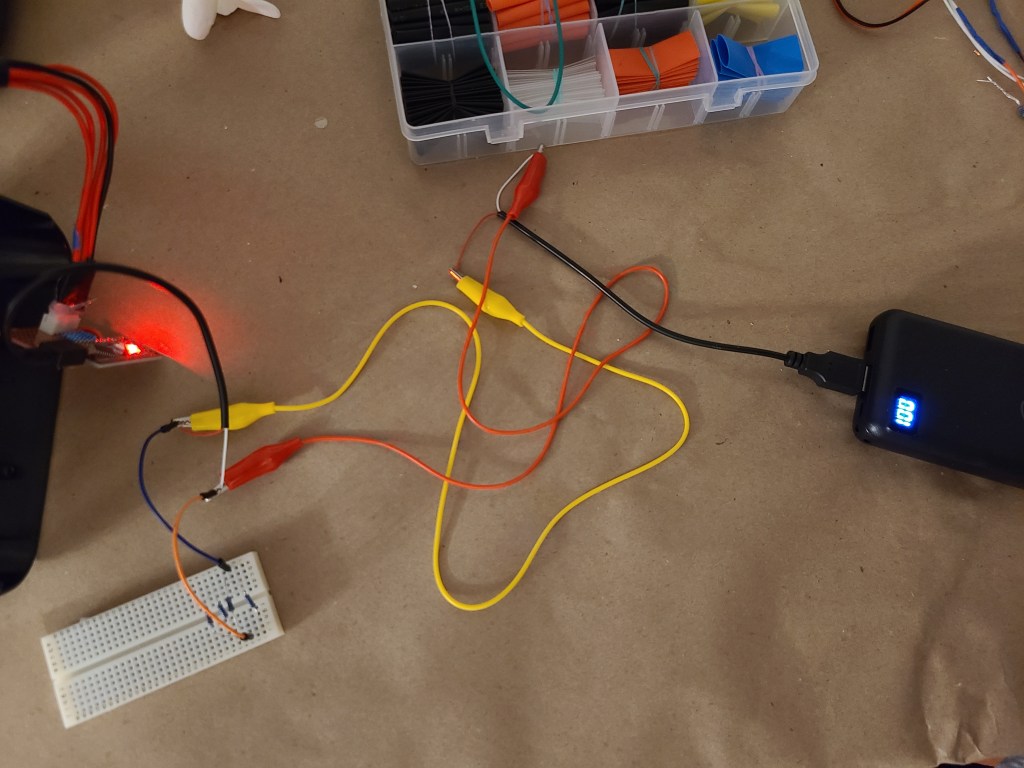
To power the board, I decided to use a phone power bank, as I hoped it would be an easy solution… I should know better.

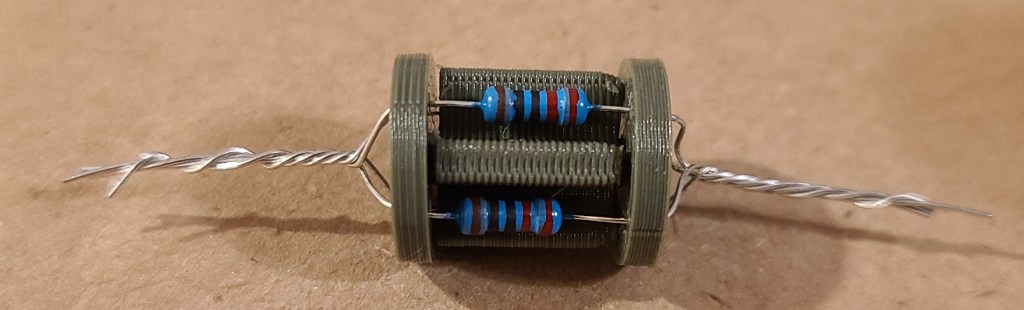
Hooking the board to the phone bank powered the lights…. for less than a minute. Then the power-saving features on the bank determined there wasn’t actually enough of a load on the circuit, and cut out. After a lot of fiddling with resistors, I added a bundle of 4 resistors in parallel to the circuit to add a little bit of load, which makes the power bank stay on.
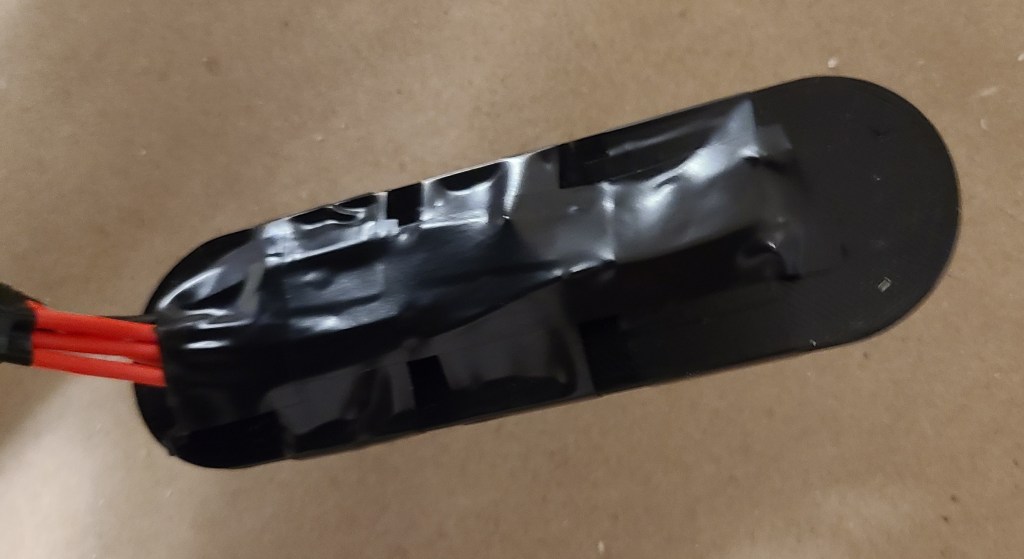
Once I had verified that the power bank would stay on, I went to permanently install the components. I continued cannibalizing the cable I was using, and wired the resistor into the circuit. I also added the toy’s original power button into the circuit as it would be a conveniently accessible button already built into the casing.
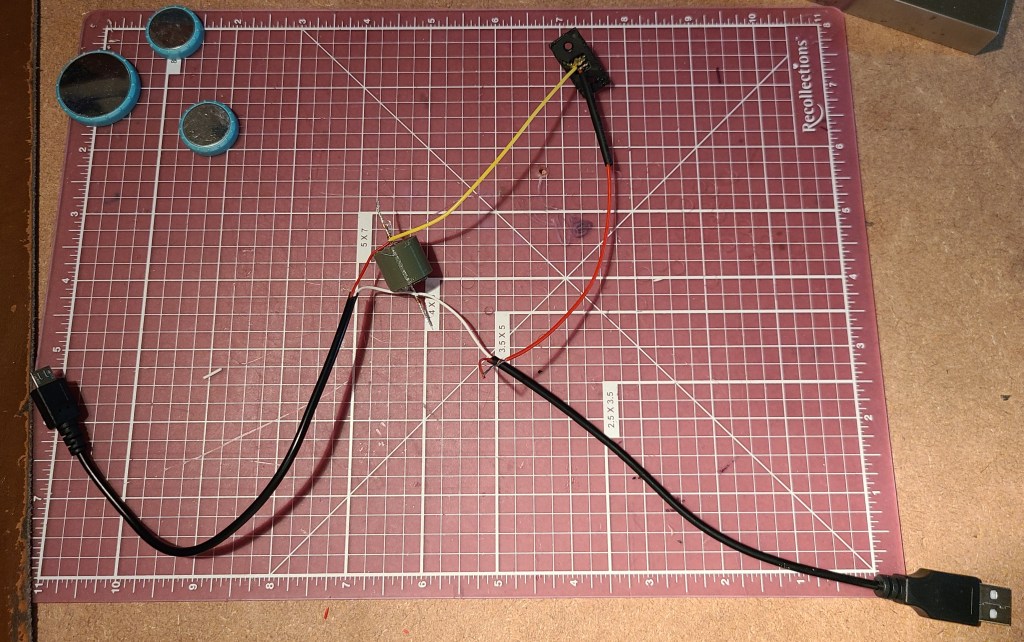
Of course, the one segment of the wire I HADN’T messed with turned out to have a short. I had to cannibalize another wire end to bypass it. (Not shown, just annoying)
Then I had to figure out how to mount everything so that it would stay in place and function reliably. I went by my old standby for mounting things: hook-and-loop-backed command strips.


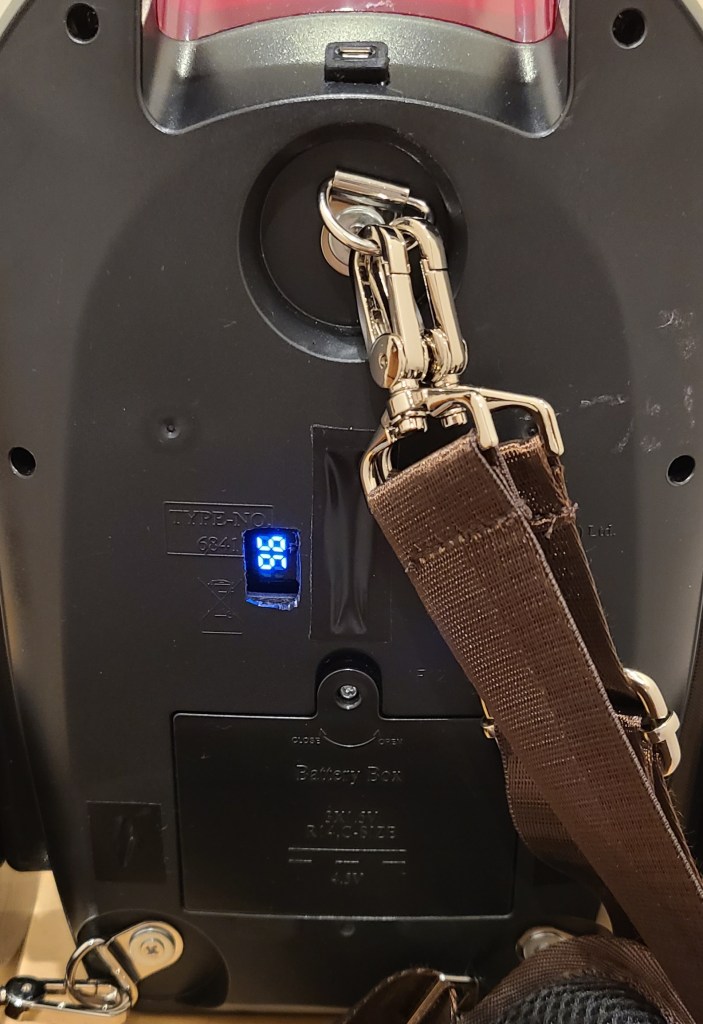
I used the modified USB cable to connect the two halves together for closing up. I also added an extension cable for charging the power bank without opening up the case, and a cut a hole for checking the display of the power bank to determine the charge status.
With that all wrapped up and functioning, here’s the light sequence. Pay no attention to the other changes for now.


