All posts by Technomancer_Ral

MTG Deck Rebuilding

I can’t remember if I’ve mentioned it before on here, but I play Magic: The Gathering, often going in to play casually at the game store, particularly in the Commander format (formerly known as EDH).  I pick a theme for a deck, and assemble 100 cards to build that deck according to that theme and the rules.

One of the decks I’ve always wanted to build, partly because it was one of the first things I ever heard about in Magic when my brother told me about it when we were kids, is a sliver deck.  Slivers are creatures within the world of Magic that mutate and share their mutations with other slivers (thematically).  Gameplay-wise, whenever you play a new sliver, it has some ability that it then shares with all the other slivers (more or less).  One sliver you play might give them all +1/+1, another might give them first strike or deathtouch, etc.  I finally built that deck recently, and had ordered some more cards to fine-tune it.  Yesterday, some of those cards came in, and I planned to start integrating them into the deck.

The deck is gone.

I’ve looked all over my house, my car, the game store, the bag I carried them in, the deck is not there.  It’s been driving me nuts for the past 24 hours.  I finally built what I wanted, and now it’s gone, possibly through carelessness on my part, and that irks me.  I’m going start carrying my decks in a more reliable setup, and take inventory of which ones I have on me much more frequently to prevent this from happening.  I put too much time (and yes, money) into this hobby to start losing things because i tried to carry too many decks in a bag that can’t hold them all without them falling out, or forgetting them behind a box or bag or something at the game table.

So, I’m rebuilding.   Maybe I’ll get lucky and someone found it, or maybe it’s in some weird place that I put it for some unfathomable reason and forgot.  But, I’ve always wanted to play this deck, and I’m going to.  And I’m going to build it better this time.

To help with that, I’m keeping in mind the things I learned from building it the first time.  It’s technically a five-color deck, but trying to truly play five colors, particularly in the Commander format that prevents you from using multiples of anything other than non-basic lands, is a recipe for getting stuck with the wrong mana at the wrong time.  I’m making it mostly tri-color, with a splash of the other two colors.  I’m also cutting out most of the non-basic lands that I used before that came into play tapped, and some of the not-so-great mana rocks that always came out at the worst possible time.

Also, this time I’m using this site: Deckstats.net

By putting my decklist in, I’m getting an analysis of the mana curve, mana color distribution, mana production distribution, test draws, and more to help me tweak the deck before I purchase (or in my case, repurchase) a single card.  I’m sad that I lost my cards, and it’s gonna cost me, but I’m going to build a better deck.

AND MAKE SURE I DON’T LOSE IT THIS TIME.

Hopefully none of you will make the same mistake.  Always keep track of your decks, and if your bag seems like stuff might drop out, you should carry less or get a more appropriate bag.

Snapmaker 2 Kickstarter Upcoming!

(Note:  I’ve updated this article after it’s original posting, due to updates in information and in my own setup)

Update 05/04/2019:  Kickstarter countdown is ongoing.  Countdown clock till launch is here:

Snapmaker 2 Kickstarter Countdown

Back to the article:

As I’ve mentioned in a previous post, the Snapmaker 3D printer is a combination 3D printer, laser engraver, and CNC milling machine.  As I said at the time, the original model is smaller than my Colido DIY and would have required me to downsize my printable area (assuming I was replacing rather than supplementing the printer).  I had also gotten the impression that a 3D printer with a single z-axis column can be prone to having vibration issues.  They had teased an image of a two column model that they were going to release down the road, but they had not provided a lot of information about it.

Well, that’s changed.

Somewhat recently they announced an upcoming Kickstarter campaign for the Snapmaker 2.  The Snapmaker 2 is their blanket term for their next generation, which has upgraded components across the board.  It also includes three sizes of printers you can get.

The three sizes have the following print areas:

  1. Small:        165 mm W x 170 mm D x 145 mm H (at least 5.7 inches on each side)
  2. Medium:   230 mm W x 265 mm D x 240 mm H (at least 9.05 inches on each side)
  3. Large:        330 mm W x 365 mm D x 335 mm H (at least 12 inches on each side)

As you can see, the larger two sizes have the two column design I want, which should be more stable and provide the larger build area I need for some projects.  I haven’t decided which of those two I’ll eventually want, but I’m pretty sure I’m going to be getting one of those two at some point.  There are all kinds of projects you can do with a print volume that size.

This new generation appears to be loaded with features, including auto-leveling, wi-fi control, filament sensors, power-loss detection and recovery, and more.  There are also a number of improvements on the implementation of the original Snapmaker’s features.  That’s a hell of an improvement over my Colido DIY which was almost completely manually operated, and a couple steps beyond what my new Monoprice Select Mini Pro has.   I look forward to being able to get more reliable large prints that I can run wirelessly and not require a computer to be plugged directly into it.

I’m looking forward to learning more, and hopefully getting my hands on one of these sturdy multipurpose fabbing machines.  Gonna get busy building with one of these!

Since the original publication of this post, the Snapmaker Team has been in touch with subscribers to their newsletter, giving us previews of the features and asking us whether we would be satisfied with the features and improvements they displayed.  I highly recommend subscribing to their newsletter if you want to keep in the loop on the Snapmaker 2.


While you are here, please take a moment to glance at the other parts of my site.  You may find even more useful information related to our shared interests here!

VR Feature Wishlist

Here’s a list of features in various media, including some VR games themselves, that I would like to see implemented across most if not all VR games.  I may have to come back an update this every so often as I remember or come across things.  I’ve separated them into things I think are needed, things I’d like, and things that would be cool but I don’t expect to have anytime soon.


Needs:

Standardized Controls:

Depending on the VR developer, they will choose different control schemes based on what the developer thinks is a good idea.  In particular, the control to grab or to interact is often moved around between the A button, trigger, and grip on the Oculus Touch controls, which gets confusing when switching games.  “Let me just grab this item from you… HOLY CRAP, I DIDN’T MEAN TO SHOOT YOU!”

Customizable Controls:

I don’t know why we’ve gone backwards on this, but most VR games do NOT have a controls screen that allow you to remap the controls at all.  It can be difficult to even find instructions on what controls do what within a game.

Sometimes I disagree with what a developer thinks “makes sense” for controls, or maybe I want to unbind a command entirely.  For example, Skyrim VR puts the Shout command on the right grip… and the grip button is the easiest to accidentally activate.  (Sorry, Companions, I didn’t mean to Fus your guildhall up).

In-game height adjustment:

I’m looking at you, Portal Stories: VR.  The game appears to have my eye level set at the floor, and I have yet to be able to get it to work with me being at the correct height.  It’s kinda hard to interact with the puzzles when I can’t reach the buttons, objects, or get enough altitude to aim the teleport.

Treadmill Compatibility:

Go figure, the treadmill owner wants games to take treadmill input.  Anyway, I tend not to buy VR games that don’t have the inputs for it, but that is troublesome to determine, which I’ll get into below.  I know that those of us with treadmills are early adopters, but we would like at least some support for them.

Adequate Labelling in Stores:

There isn’t standardized labelling for certain aspects of VR games in the Steam or Oculus stores.  The following items need to be addressed/identified as features when they are present and/or explicitly being listed as absent:

  • Peripheral Compatibility
  • Keyboard/WASD input accepted (this also ties into peripheral compatibility)
  • 1st person / 3rd person / variable
  • Flexibility (again, this ties into the treadmills.  Games that require picking stuff off the ground do not work well with treadmills that have a solid ring around waist height.

Currently I have to go asking around their forums and hope someone responds to figure out some of these things.  You don’t always get answers, and I’ve seen gamers being ridiculed for even asking some of these questions.  I mean, come on, peripherals are thing, and they’ve often used keyboard input mapping to interface with games for decades at this point.  False superiority among ignorant people bugs me.  The Dunning-Kruger Effect strikes again!


Wants:

Swipe to open in-game menus:

Obligatory Sword Art Online reference is obligatory.  I like the idea of a standardized gesture opening things vs fiddling with controls on the controllers breaking immersion more.  I’d just like for the rest of the menu to actually be made sensibly instead of their insanely nested menus.  I didn’t notice how insanely nested/badly designed the menus were until I watched this video on youtube channel “Mother’s Basement,’ but I still like the gestured-based menu opening.

Partial/Full Body tracking:

Immersion currently has issues with free-floating hands in VR.  Also, for more social games such as VRChat or Altspace VR, a lot of body languages is lost with only the headset and hand controllers tracked.  And, sometimes you wanna dance… and it just doesn’t come across.  Or maybe that’s just me.  Then again, with using a treadmill your body posture can be altered oddly, so it might be for the best that we don’t have that much body tracking for now.  Maybe we just need some upper body tracking.  I know that there are ways to get this in your own rig, but I don’t see it widely supported right now, and the main method I know involves a Kinect camera, which has been discontinued and requires digging through secondhand stuff.

Intuitive inventories: 

This pretty much requires hip and possibly shoulder tracking.  It would be great to have a belt inventory and possibly a back inventory for a lot of games, but so far I don’t usually see this implemented often or well.  I want to reach for something on my belt, but the few games that do have a belt inventory are having to guess at what the appropriate spot is, based on the current position of your headset.  I would like to be able to reach for items on my belt or weapons on my back without having to look and hope that I’m reaching in the correct spot.  Then again, the belt is a more difficult place for me to use things now that I use a treadmill.  It would still be nice to have the option, though.

Full-body avatars:  

Once again, kinda requires some body-tracking for the arms to not drive you nuts, but freefloating hands can get weird.  I have run into some odd implementations at times, where the avatar’s arms are shorter to mine and the game doesn’t somehow make adjustments for it, so I end up in situations where I’m still extending my arms and the character’s arms are at full extension, which is a weird feeling.  I also find it kinda odd when in most games you look down and you are still a free-floating head with no body, and your in-game shadows reflect this.  It breaks immersion to not see “my” body and to see a headset and controllers (or hands) via my shadow.

Avatar-Centric Persistent Space Through Loading Screens:

I know it’s a mouthful, and I might need to change what I call this.  I don’t know of an actual term for this, but many games completely remove even the rendering of your controllers, let alone your avatar’s hands and body when you go into a loading screen.  You go from being able to perceive your own body location and orientation of your hands via sight to suddenly being bodyless, and in some cases blind.  Star Trek: Bridge Crew is bad about this, everything goes to black when you load during warp from one location to another.   It’s disorienting and uncomfortable.

We should have at least a digital skeleton of some kind (think of what Neo sees when he uses his code-based vision in the Matrix movies) when loading from one place to another, and not suddenly lose all reference points.  In other games we might need even more, as whether you have a weapon drawn when you walk into a place can drive an entire interaction, and it would be great to be able to see whether it is still drawn and possibly do some inventory management.  You might say “you should remember whether you have it out.”  Well, first, depending on the user’s equipment, loading screens can take a while, to the point you would almost feel more comfortable taking the headset off, and you can forget in that time.  Secondly, the loading screen can trigger the doorway effect, like when you walk to another room to do something and you forget what it was when you get there.

In any case, I would like to have some persistence in my experience through the loading screens, particularly since they block out the rest of your world.  I would have listed this as a need, but I get the feeling that the code and hardware requirements would be driven up a good bit by this, so it’s in the want category.


Would be awesome:

Haptic Gloves:

Yeah, I know it’s cliche to mention this from Ready Player One, but they would really make interacting with objects more intuitive.  Grabbing objects to pick them up, turning doorhandles, and similar interactions would be more comfortable.

I know this is a niche thing, but it would also be really helpful for thrown objects.  With controllers in your hands, throwing objects without throwing your controller is a pain, even if you keep the wrist-loop on so you don’t accidentally throw the controller through a window.  I wanna be able to use grenades, throwing axes, throwing knives, etc. in games, but having a controller in my hand and not actually letting go while still throwing the object correctly in game is difficult.

Cross-compatible Avatars:

Again a feature from Sword Art Online and from Ready Player One, but I would like to be able to create an avatar that I can carry from game to game, probably with different resolution scaled between games.  This would particularly be great for people wanting to do VR livestreaming from within VR.


Well, there you have it.  My current list of things I think VR games need, things I want, and things that would be awesome.  Feel free to comment what else you think it might need, I’m looking forward to seeing what I’ve overlooked… and if any game devs are reading… PLEASE READ THIS POST AND THE COMMENTS AGAIN.  It will improve our experiences and likely improve your sales.


DM Tools: DM’s Toolbox of Holding

I thought it was time to share some of my tools of the trade.  This toolbox was supposed to be the first post in that series, but I realized the section with Flatminis wouldn’t make much sense without doing the Flatminis article first.

Anyway, I would like to start by making it clear that this is just my toolbox, what I’ve decided to put together and what works for me.  This is by no means saying that this is “THE” way to put a DM’s toolbox together, this is just what works for me.  I know many other DMs who use almost completely different and often much smaller sets of tools/ game aids and run games as good or better than mine.  I also bring in the toolbox regardless of whether I’m running or playing, as a DM can always have a bad day when they forgot to bring something, or a player might have forgotten stuff for the character they are playing that night.  I must note that I’ve only been running Adventure League games with this toolbox, so the items I might need are more predictable and the NPC characters are premade, so there are some items that homebrew DMs might use to help with a more spontaneous game that are not included in the toolbox in it’s present form.

I’ve included hyperlinks in this article to the appropriate Thingiverse pages for most of the items in the box.

For my toolbox, I got a standard crafting toolbox from a hobby store, since it has a bunch of compartments for small objects.  I customized it a bit for my own use.

Toolbox_Top.png

Translation of the runes:

“I prepared explosive runes this morning”

I finally found a place for a bumper sticker I’ve always wanted to use.  I thought it was appropriate for DMing.

Back_Of_Toolbox.png

One of the top compartments holds a couple of spare sets of dice, in case of a new player or someone forgetting their dice.  The other holds a couple dozen goblin Flatminis.  You can never really have enough goblins.

Toolbox_Top_Open_2.png

Here’s the inside of the toolbox.  As you can see most of the items in my toolbox are 3D printed.  I won’t go into everything in the box, but I  will cover some of the highlights.

Toolbox Open.png

At the top of the toolbox are minis I keep for a lot of common enemies, mostly the Flatminis kind.

Toolbox_Open_Upper.png

This toolbox has minis for groups of:

For use with those, I have numbered bases to make DM monster accounting simpler, and unnumbered bases for more distinct minis that I covered in another post.  For enemies I don’t have specific minis of, I have ninjas.  Because… why not ninjas?

773f84a53f646d9ff9563ef1286d77f5_preview_featured.jpg

FlatMinis: Ninja

I have doors for when we want to mark open or closed doors on the game mat.  When I made these I scaled them up so they’d match a 1 inch grid.

doors1.jpg

Mansions of Madness Doors

I even have a kicked in door that someone designed on Thingiverse shortly after I put a general inquiry out on one of the groups.

Kicked In Door.jpg

Broken Door Miniature

For when I don’t have a distinctly different mini for a chieftain or other leader of a group of enemies, I have some different colored marker bases to indicate them.

Minis Leader Marker.jpg

Minis Leader Marker

For creatures that are enlarged from medium to large, or to hold some of the larger minis I have, I have these bases which I modified to be compatible with a few different things.

Numbered Multicompatible Base.jpgNumbered Multicompatible Enlarger Base

I also have a few templates for various spell effects, and markers for effects.  The easiest to do one are the status effect indicators, which are just rings from plastic soda bottles.  I keep them on a carabiner clip for ease of storage.

templates.jpg

Some of the most fun/useful items to me are the tokens I use.  I have tokens to remind people of various effects they have access to.  Inspiration tokens for DMs to hand out, bardic inspiration tokens for my bard to use, a token to mark enemies who failed to save against vicious mockery, and death save success and failure tokens.

tokens.jpg
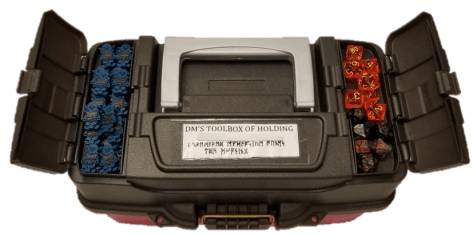
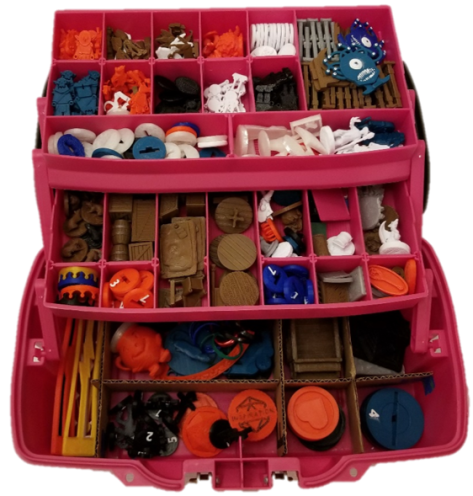
There are many other odds and ends in here such as scatter terrain, and minis that I rotate in and out of usage when I feel I need them (or not).  I often don’t use more than a fraction of the box when I’m not DMing, but I’ve also had situations where it ended up saving the game that night because the DM forgot to pack most of their minis or didn’t have a collection of their own yet.  That (and all the stuff I tend to make for my own characters) makes it worth it to me to carry it around every game night.

Oh, and I can’t forget this guy:

kool-aid

OH YEAAAAAAAH!

Sometimes you just need somebody to represent a large creature.

VR Sensor Rerouting Update

The hooks appear to be working pretty well, though only time will tell whether they support the weight properly long-term.  I decided not to rearrange the sensors due to the hassle involved, and just repointing them a little in their existing mounts seems to be enough to get better coverage.

And the process of just redoing the wires was enough of a pain to begin with.

  1. Removing the wires from the walls (I accidentally tore off some paint in one spot)
  2. Removing old tape from the wires
  3. Cleaning gunk off of long wires with tiny alcohol wipes (there are better ways to do this, but I didn’t think of it beforehand).
  4. Measuring the locations for the new hooks.
  5. Spending thirty seconds per hook pressing them in place for the adhesive to stick.  (This suuuuuuuuuuuuuuuuucks.  Repetitive tasks with a lot of force on your fingertips starts to hurt.)
  6. Clipping all the wires into place.

Also, You have to be careful with corners and long stretches.

Rerouted Wires 2.jpg

You probably can’t tell in the upper left, but when I was making the 90 degree turns in plane, you might have to be careful with which way you make the hooks face based on the direction you expect tension in the wires.

Also, at the sensor itself, having those additional couple of hooks is kinda crucial, to take torque off of the wire as it leads into the sensors so that it doesn’t rotate or get pulled out of the mount after you’ve set it.

Anyway, it took a while, but it’s (mostly) done.  There is a stretch of wire that sags a bit because you are supposed to put a hook every 2 feet, but that section of wall is completely taken up by a window, and the frame is not a flat surface (the hooks need a flat surface to adhere to).  I’m debating adding some additional hooks at an angle on the opposite side to kinda provide some friction to hold the wire up a little better.

There is a bit of annoyance at the end of the setup.  I clicked on the “would you like to set up 360 tracking” popup after plugging all of the sensors back in, and it ran through the entire setup process… which includes the unskippable tutorial sequence with the small robot.  Thankfully, it’s a well-made sequence, so it’s not too bad having to go through it again.

Weirdly, throughout that entire in-VR portion of the setup, there was a message inside the headset saying that the headset wasn’t plugged in.  Um… I didn’t have mirroring setup for this… so… how does that message serve any purpose?  How do you see the “no headset plugged in” message if you don’t have a headset plugged in?

In any case, I am DONE with this for a while, and it looks much nicer than the masking tape and the painter’s tape before it.  It should hold better, too.  Command strips are like magic for hanging stuff on my walls without damaging them.  One could even say… technomagic…

VR Sensor Rerouting

In order to get a 3 sensor setup for 360 degree coverage with my Oculus Rift, I had to route cables around the top of the walls quite a while back.  First I mounted it with painter’s tape, but that was glaringly ugly.  I’ve also tried variations/combinations of double-sided tape and masking tape.  Given that the color of the masking tape is closer to that of my walls, it’s not quite as bad.  However, I realized later that this is leaving a nasty residue on the wires, and still sometimes falls.  And still looks crappy.

So, I’m trying something new.  Previously I’ve picked up some pieces that are for routing cables for phone chargers and such, but they are a bit of a pain to use.  More recently, I picked up some command strip hooks meant for wiring holiday lights.command hooks.jpg

I took down the sensors and the extension wires, and spent rather longer than I’d like cleaning the gunk off of them with alcohol wipes.

My next step is to figure out how I want to rearrange my sensors (I’m doing some reading/viewing on Oculus sensor layouts), moving the sensors with some new command strips, putting the command hooks in to support the wires, and clipping all the wires in.  It’s a lot of work, but hopefully it should get me some better sensor coverage and look a lot neater in the process.

VR Horizon: TPCAST Wireless Adapter For Oculus Rift

I was browsing around the internet, and was reminded that this is a thing.

TPCAST Wireless Adapter

It’s a wireless adapter that removes the need for entangling cables with VR, with the tradeoffs (that I know of) being:

  1. Additional cost (it’s listed at $319 at the moment on the manufacturer’s website)
  2. Added weight on your head
  3. You have an external transmitter pointed at you, if you worry about that sort of thing

It comes in three parts:

  1. PC Transmitter module
  2. RX Module
  3. Power box

The transmitter module streams the data to your headset, the receiver receives the transmission and sends it into the headset itself, and the powerbox that recharges the battery.

The battery appears to have a 5 hour power supply, so that’s more than my usual VR time.  I’m not sure how heavy it is, though.

At the time of writing, they are out of stock at the manufacturer’s website, so I likely won’t be ordering one anytime soon.  I see it listed elsewhere… for more than $200 additional!  Eventually, though, going wireless could be worth the cost.  When I’m on the treadmill I’m constantly getting tangled up in the wire when I turn a lot, and dealing with the headset wires in general is a pain.  Also, the systems I’ve seen for suspending the cable would require me to put screws in the ceiling, which I’m not inclined to do.  If it were a plain ceiling, I wouldn’t care, but I don’t want to risk doing excess damage to the textured ceiling.

From the reviews I’m seeing, there are many issues with the base version, and an upgraded 3rd party software (Open TPCast) takes a bit more money and work to get working, but is apparently worth it.  The base version has latency issues, dropped frames, and the microphone stops working.  The upgraded version requires buying and downloading additional software, then installing it on to a microSD card hidden inside the battery pack’s casing.

Still, it’s something to consider for the future.

VR Rig Upgrades: SSD Capacity

An issue I’ve been fumbling around with for a few months now is upgrading my VR rig with a new Solid State Drive (SSD).  I had originally mounted it in a hot swap port on my PC (and had to create a case over it to protect it).  However, it eventually made my PC unstable, and I had to remove it and send it in for warranty replacement.

The replacement came in a few weeks ago, and this time I decided to install it as a replacement for the existing SSD inside the computer.  When I had had my PC built years ago, the computer was built with an SSD to run the operating system and some programs, as it would make them load a lot faster than on a standard hard disk drive.  This was fine.  However, it has filled up over time, despite me installing most things to the hard drive instead.  I had kind of reached a stable maximum on that drive.

The problem was that the load times for games was getting rather lengthy in newer games, largely in part to the time it takes to read the data off of the hard disk.  In regular games, it’s no big deal, but in VR, load times make a HUGE difference.  You are sitting or standing there, blind to the world, with very little input except whatever loading screen the game designer had incorporated… and they didn’t always think those through (holy crap, the glare of a bright logo in a dark background is miserable).

This is why I had bought the new SSD in the first place, to add a terabyte of storage space to transfer all my VR games to.  Anyway, this time I decided to just replace my old SSD with it, and move everything over.  This is where I had gotten stuck until I did some research and talked with a few people I know who are more knowledgeable in this area.  I finally got it to work this past weekend, and I’ve been trying to tweak and move stuff since then.

Here are the main things I wish I had known more quickly going into this.  I know this is not going to be the best detail, but it should be enough to help you find the rest of the information more quickly.  I was doing this over the period of a few weeks, and I wasn’t exactly taking notes.

  1.  When you first plug in a new SSD, you will have to initialize the disk. You have to have it plugged in, and access compmgmt.msc through the cmd prompt.
  2. While you are there, make note of all the details of the partitions that are currently on your main SSD.
  3. You will need another hard drive with space larger than the SSD you are upgrading from.
  4. You will need Acronis software, and a thumb drive to run it’s software from.  Use this to backup the original SSD onto the extra hard drive.
  5. You will need another thumb drive.  Use the tools that come with Windows to make a repair disk on this thumb drive.
  6. Turn off the computer, and use standard computer modding procedures (turn it off, unplug everything, ground yourself, etc) to swap out the SSDs, leaving the original disconnected.  Put everything back together.
  7. Using the Acronis software on the flash drive, and the hard drive you made the backup to, restore the image of the original SSD onto the new one using CUSTOM settings.  You will want to set the system and recovery partitions on the new SSD to the same size as the original, and expand the size of the C: drive partition to fill up the rest of the space on the drive.
  8. When you try to boot your computer afterwards, it won’t work.  You haven’t done anything wrong, the Windows OS apparently uses references not just to the pathname of the drive but references to the specific drive hardware it is running on.  You will need to shut down the computer, swap out the Acronis software drive for the Windows Repair drive, and reboot the computer.  The repair software will fix the install itself.
  9. Now that it’s working, you may still have some cleanup to do.  If you have been running games from your hard drive, you will want to move the installs.
    1. Oculus:  Thankfully, in more recent updates since when I previously tried to install the SSD, the Oculus software has added an option for being able to move installs from one location to another.  Use it to create a new game install location on the SSD and then move all your VR games over from within Oculus.  DO NOT TRY TO MOVE THE FILES MANUALLY.  It appears that Oculus software does not acknowledge files that are already within the correct folder unless Oculus moved it there in the first place.
    2. Steam: For Steam, you use the software to define a new install location, then move the files from their old location to the new one, and try to run the game.  Steam will get confused for a bit, but then track down where the current install is and run from there.

So, that’s the gist of what I did.  I know it’s lacking in the technical details, but hopefully it will be enough to help you track down the latest info on how to swap an SSD out for a larger one if you need to.  I didn’t know enough about some of these concepts when I started to realize that some of those steps were even a thing.

Less loading time, and more game time for me!

LOOT DROP: ULTIMATE BOARDGAME BACKPACK, PART 2, DM or Porter?

Here is how I pack the new backpack for DMing D&D 5E.

Starting at the top of the pack, there is a small compartment, meant for earbuds, chargers, etc.  I don’t really use it much.

earbud compartment earbud compartment open.jpg

Next is the large upper compartment of the pack.

top compartment.jpgI keep the dice case in the dice tray, held in place with provided elastic straps.

dice case.jpgdice case and tray.jpg

dice case in straps.jpg

On the right in an internal pocket, I keep my “Healer’s Kit”

health dice in pocket.jpg

I kept getting annoyed trying to find how much healing each healing potion did, and finding sufficient d4s for it, so I made this kit.  On the inside of the lid it has the values for each healing potion category, and an important reminder:  It takes an action to quaff a potion!

health potion kit.jpg

health potion kit inside.jpg

On top of the healer’s kit, and in the upper left mesh pouch, I keep some sets of spell cards.  In the upper right mesh pouch I keep a set of extra d6s, because it is the one die that uses multiples the most often.  Fireballs, anyone?  Green for green flame.

top compartment mesh pockets closed.jpg

top compartment mesh pockets.jpg

Moving out of the upper compartment in the side compartments I keep more sets of spell cards (for different types of characters.  In the bottom right compartment I keep a bottle of water for cleaning wet erase markers off of game mats.  I also strap my game mat to the side of the pack inside a dry bag.

right side of pack.jpg left side of pack.jpg

left side.jpg

In the pocket on the outside of the main compartment “door”, I keep my folders and character folios.

folders and folios 2.jpg

In the mesh pockets on the inside of the main compartment “door”, I keep the spellbook for my wizard (I made it before I really started collecting spell cards), wet erase markers, other writing utensils, a laser pointer, and some paper towels for cleaning the game mat.

mesh door.jpg

Now, for the main event, I have the main compartment fully expanded.

main compartment.jpg

I keep a lot of rulebooks with me, the core 3 + Xanathar’s Guide + whatever hardcover I’m running are the main ones I keep with me.  I use the Dungeon Master’s Screen (Reincarnated version), with a few notes that I’ve attached to it.

rulebooks and screen.jpgI also keep the toolbox and flatminis case in there for minis and tokens.

flatminis and toolbox.jpg

I also have a small card folio that I use whenever I need to compile a spellbook for a character from my spell cards.

spellcard folio.jpg spellcard folio inside.jpg

And, there you have it.  My massive DMing bag of holding set up for Adventurers League nights.  There is more I will probably throw in here if I run homebrew games, but this is going to be it’s usual configuration.