I know this is kinda the opposite extreme from the way I tend to do things, but you don’t absolutely HAVE to have a lot to DM. Fifth edition has greatly streamlined the game, and gives a bit more freedom. Below I’ve listed what you need, and sometimes the stuff you might want to upgrade to as the next step if you continue with the hobby and have the time and/or funds. Or you can keep playing minimalist style!
Dice:
Technically you could probably use a free app on your phone. I don’t recommend it. You need at least a set of dice for yourself. It’s just not the same without dice.
Beyond that, you don’t actually need to buy anything! The rest can be substituted or skipped.
Rules:
First off, you don’t absolutely have to have the books. I highly recommend having the books, but if you’re just getting started, the basic rules are posted online. It’s enough to help you learn the basics, build your first characters, and run your first campaign. You can find the rules here:
Next tiers (in this order):
- Player’s Handbook
- Monster Manual
- Dungeonmaster’s Guide
- All other books are purely optional
Adventures:
Not sure if you can weave fantasy worlds on the fly? Hardcover adventures too expensive and unwieldy to learn? There are many cheap and free modules available online. The idea of a module is to have a (mostly) self-contained adventure pre-generated and ready for use. The DM should at least skim it in advance, but there are instructions provided for the DM to use as a basis for the adventure. Many can be found here:
Next tier:
- Homemade adventures!
- Hardcover adventure books
Battlefield:
Having started in 3.5, I’m used to playing combat encounters on tactical maps, using wet erase markers on the mat to draw the battlefield, then placing our minis on the map and engaging in battle. You don’t absolute have to do that. If you want tactical maps, you can use a 1-inch grid paper.
But you can also forgo the map entirely.
D&D 5E reintroduces the concept of “theater of the mind.” You can keep the layout of the battlefield in your head, describing things to your players, and letting them use their imagination to envision the battlefield too. It may take a bit more mental effort, but it allows you to skip carrying around the following materials:
- Battlemat
- Markers
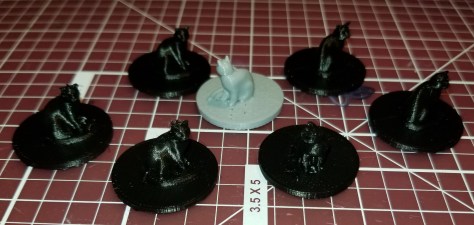
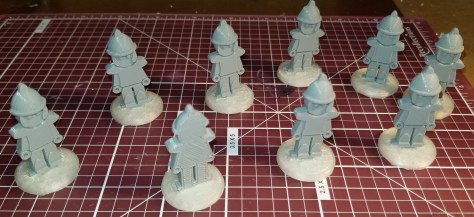
- Miniatures
- Templates
I’ve tried this a couple of times, and it can be freeing not to be limited to what you can draw or place on a grid.
Next tier:
- Battlemat or grid paper
- Markers or pencils
- Miniatures (there are many tiers and options of these)
- Templates
DM Screen:
It is highly preferable to keep your notes, die rolls, and minis (if you use them) hidden from your players. You can easily make your own, or go without. You don’t have to pay for a fancy piece of cardboard with art and stats on it. I’ve seen people make screens out of binders, taped pieces of cardboard, and various online non-WotC options. Or, again, you can skip the screen if you are comfortable rolling in front of your players.
Next tiers:
- DM Screen or DM Screen Reincarnated (these have artwork and stats on them from Wizards of the Coast)
- Any of a bajillion fancy screens you can find online or have made
And that’s pretty much it! Any game store or online store would be happy to sell you all sorts of accessories in various price ranges, but they are OPTIONAL! You don’t have to buy a ton of expensive stuff to run a good game. Sure, the detailed painted minis are nice, some people develop a dice obsession, and it’s nice to have a great setup, but you don’t NEED them. GO FORTH AND GAME!